instruction manual for nostalgia popcorn maker
Welcome! This manual guides you through setup‚ operation‚ and care of your Nostalgia popcorn maker‚ bringing cinema-style treats to your home easily and safely․
Enjoy delicious popcorn with this user-friendly appliance‚ designed for both classic and customized snacking experiences – explore the possibilities!
What’s in the Box?
Carefully unpack your Nostalgia Popcorn Maker! Inside‚ you should find the following components: the main popping unit itself‚ featuring a cool-touch housing for safety․ A convenient measuring cup is included‚ crucial for portion control and optimal popping․
You’ll also receive this detailed instruction manual – please read it thoroughly before first use․ Ensure you locate the power cord‚ designed for standard electrical outlets․ Some models may include additional accessories like a butter melting tray or seasoning spoons․
If any parts are missing or damaged‚ do not operate the machine and immediately contact customer support for assistance․ Retain the original packaging for potential returns or warranty claims․
Safety Precautions
Important Safety First! Always operate your Nostalgia Popcorn Maker on a stable‚ heat-resistant surface․ Never immerse the unit‚ cord‚ or plug in water or other liquids․ Close supervision is necessary when the appliance is used near children․
Avoid touching hot surfaces; use handles or knobs․ Unplug the popcorn maker from the outlet when not in use and before cleaning․ Do not operate the appliance with a damaged cord or plug․
Ensure proper ventilation during operation․ Never attempt to repair the appliance yourself – contact qualified service personnel for any repairs․ Failure to follow these precautions may result in injury or damage․

Setting Up Your Popcorn Maker
Get Ready to Pop! This section details preparing your Nostalgia Popcorn Maker for initial use‚ ensuring optimal performance and delicious results every time․
Cleaning Before First Use
Essential Preparation: Before enjoying your first batch of popcorn‚ thoroughly clean the popping chamber and removable parts․ Use warm‚ soapy water and a soft cloth to wipe down the interior of the popping chamber‚ ensuring all manufacturing residues are removed․
The stirring mechanism and measuring cup should also be washed and dried completely․ Caution: Never immerse the base unit in water or any other liquid․ Simply wipe the exterior with a damp cloth․ This initial cleaning process guarantees a fresh‚ clean taste and prevents any unwanted odors from affecting your popcorn․
Allow all components to air dry before assembly and first use․
Powering On and Initial Test
Initial Operation Check: Once cleaned and fully dried‚ plug your Nostalgia Popcorn Maker into a grounded electrical outlet․ Before adding kernels‚ perform a brief test run to ensure proper functionality․ Power on the unit using the designated switch – observe if the stirring mechanism activates smoothly and the heating element glows․
Run the machine for approximately one minute without popcorn․ This helps burn off any residual manufacturing oils and confirms the unit is operating correctly․ A slight odor during this initial test is normal․
Caution: Do not touch the popping chamber during this test as it will become hot․
Understanding the Components
Key Parts: Familiarize yourself with the popping chamber‚ measuring cup‚ and stirring mechanism – these elements work together to deliver perfectly popped kernels every time․
The Popping Chamber
Central to Operation: The popping chamber is where the magic happens! This heated space transforms kernels into fluffy popcorn․ Ensure it’s clean before each use‚ free from any residual oil or unpopped kernels․
Heat Distribution: Designed for even heat distribution‚ the chamber promotes consistent popping․ Avoid overfilling; kernels need room to expand․ Never attempt to open the chamber during operation – it reaches high temperatures!
Material & Safety: Constructed with durable‚ heat-resistant materials‚ the chamber is built for longevity․ Always allow it to cool completely before cleaning or handling․ Proper care ensures optimal performance and safety․
The Measuring Cup
Precise Portions: The included measuring cup is crucial for achieving perfect popcorn every time․ Using the correct kernel-to-oil ratio (if applicable) is essential for optimal results and prevents burning․
Capacity & Markings: Pay attention to the cup’s markings‚ indicating the appropriate amount for different batch sizes․ Avoid guesswork – accurate measurement is key! Do not use other measuring tools‚ as they may yield inconsistent outcomes;
Dedicated Use: This cup is specifically designed for your popcorn maker․ It’s recommended to dedicate it solely to this purpose‚ preventing cross-contamination of flavors and ensuring accurate measurements․
The Stirring Mechanism
Even Heating: Your Nostalgia popcorn maker features a built-in stirring mechanism designed to ensure consistent heating and prevent kernels from burning on the bottom․ This automated process promotes even popping throughout the entire batch․
Gentle Rotation: Observe the gentle‚ continuous rotation during operation․ Do not attempt to manually interfere with the stirring mechanism while the machine is running – this could cause damage or injury․
Essential Component: The stirring function is vital for optimal performance․ It’s not merely a convenience; it’s integral to achieving fluffy‚ fully-popped kernels and a delightful popcorn experience․
Making Perfect Popcorn: A Step-by-Step Guide
Get Ready! Follow these simple instructions for consistently delicious results․ Precise measurements and monitoring are key to enjoying perfectly popped‚ flavorful popcorn every time․
Measuring the Kernels
Accurate measurement is crucial! Use the provided measuring cup to ensure the correct kernel quantity for optimal popping․ Do not exceed the maximum fill line indicated on the cup‚ as overfilling can lead to uneven popping and potential clogging of the stirring mechanism․
Typically‚ 1/2 cup of kernels yields approximately 6-8 cups of popped popcorn․ However‚ kernel varieties can differ in popping volume․ Start with the recommended amount and adjust slightly based on your preference and the specific kernels used․ Always ensure the measuring cup is level when filling to guarantee accuracy and consistent results with each batch․
Avoid using household spoons‚ as they may not provide the precise measurement needed for consistent performance․
Adding Oil (If Required)
Check your model! Some Nostalgia popcorn makers are designed for oil-free popping‚ while others require a small amount of oil for enhanced flavor and texture․ Refer to the specifications for your specific model to determine if oil is necessary․
If oil is required‚ use a high-smoke-point oil like coconut‚ canola‚ or vegetable oil․ Add 1-2 tablespoons of oil to the popping chamber before adding the kernels․ Ensure the oil is evenly distributed across the chamber surface․ Never use butter or olive oil for popping‚ as they have low smoke points and can burn․
Using the correct oil type and quantity will prevent smoking and ensure a delicious‚ evenly coated popcorn․
The Popping Process ⎻ Timing and Monitoring
Once the popcorn maker is switched on‚ listen for the kernels to begin popping․ Popping will start slowly and then increase in frequency․ Do not lift the lid during the initial popping phase to avoid burns from escaping steam and kernels․
Typically‚ popping will complete within 2-4 minutes․ As the popping slows to 2-3 seconds between pops‚ immediately switch off the machine to prevent burning․ Continuous popping at a slow rate indicates kernels are scorching․
Carefully tilt the machine to allow any unpopped kernels to fall to the side‚ avoiding overheating․

Customizing Your Popcorn Experience
Elevate your snack! Add melted butter‚ savory seasonings‚ or sweet coatings directly after popping for a personalized and delicious popcorn creation․
Adding Butter
For a classic movie theater taste‚ adding melted butter to your freshly popped popcorn is a fantastic choice! Ensure the butter is melted completely and cooled slightly before drizzling it over the popcorn․
Carefully pour the melted butter evenly over the popcorn while the stirring mechanism is still running‚ or gently toss the popcorn to distribute the butter․ Avoid adding too much butter at once‚ as this can make the popcorn soggy․
Experiment with different types of butter – clarified butter offers a richer flavor and prevents sogginess․ You can also infuse your butter with herbs or spices for an extra layer of deliciousness․ Remember to always exercise caution when handling hot‚ melted butter!
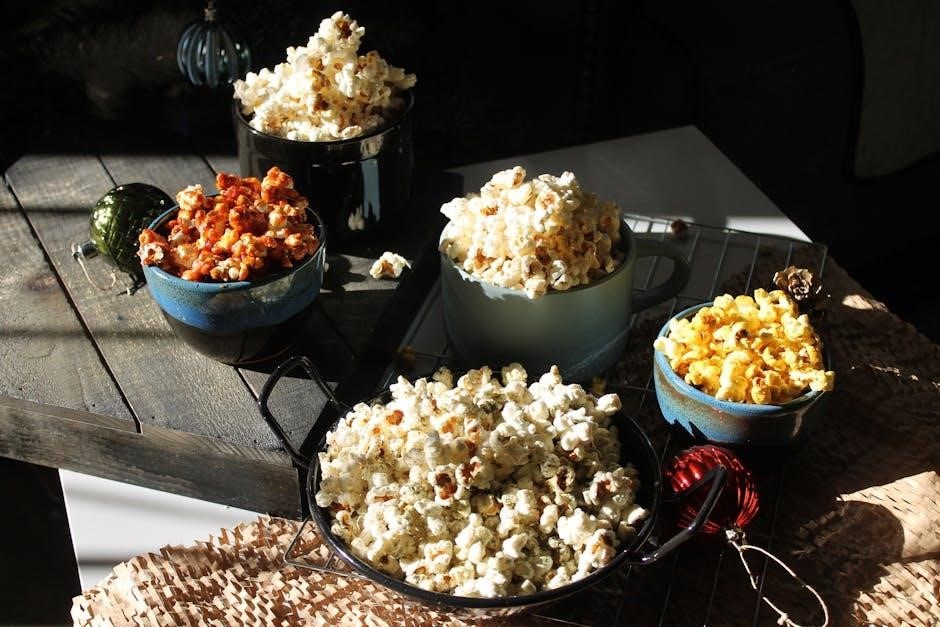
Flavoring Options: Sweet & Savory
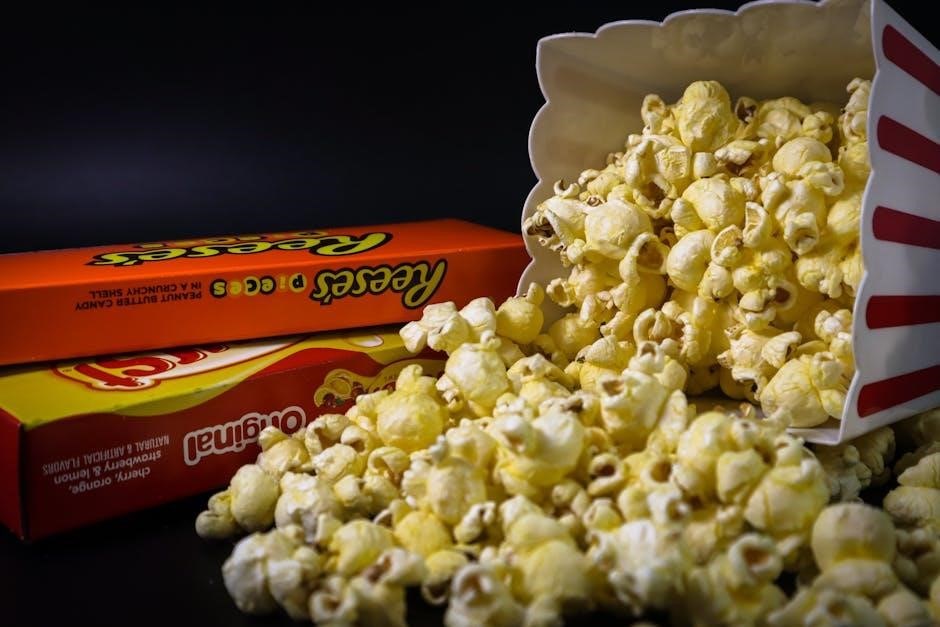
Beyond butter and salt‚ the possibilities for flavoring your popcorn are endless! For a sweet treat‚ try sprinkling with cinnamon sugar‚ powdered sugar‚ or even a drizzle of chocolate․ Caramel corn is also achievable with dedicated recipes (see Advanced Techniques)․
Savory options include nutritional yeast for a cheesy flavor‚ garlic powder‚ onion powder‚ paprika‚ or chili powder for a spicy kick․ Pre-made popcorn seasonings are readily available in various flavors․
Experiment with combinations – a dash of cayenne pepper with cheddar cheese powder‚ or a sprinkle of cinnamon with a touch of sea salt․ Always add seasonings after popping and tossing gently to coat evenly․
Adjusting Kernel Quantity for Different Batch Sizes
Your Nostalgia Popcorn Maker is versatile! For smaller batches‚ use approximately ¼ cup of kernels․ This yields a satisfying snack without overfilling the popping chamber․ For a larger batch‚ suitable for sharing‚ use up to ½ cup of kernels – but never exceed this amount․
Remember that kernel expansion varies․ Start with the recommended amount and adjust based on your desired popcorn volume․ Overfilling can lead to unpopped kernels and potential issues with the stirring mechanism․
Consistent measurement using the provided measuring cup ensures optimal results and prevents damage to your appliance․

Troubleshooting Common Issues
Encountering problems? This section offers solutions for common issues like unpopped kernels‚ burnt popcorn‚ or uneven popping – ensuring a perfect snack every time!
Popcorn Not Popping
Issue: If your popcorn isn’t popping‚ first ensure the unit is securely plugged in and powered on․ Verify you’re using fresh‚ quality kernels – older kernels may have lost moisture․
Solution: Double-check the measuring cup was filled to the correct level‚ as insufficient kernels won’t generate enough heat․ Confirm the popping chamber is clean and free of obstructions․
Further Checks: If using oil‚ ensure the correct amount was added․ A small test batch can help diagnose if the issue is kernel-related or machine-related․ If problems persist‚ consult the warranty information for support․
Burnt Popcorn
Issue: Burnt popcorn typically indicates excessive heat or an extended popping cycle․ This can happen if too much oil is used‚ or if the unit is run for too long after most kernels have popped․
Solution: Immediately unplug the popcorn maker․ Reduce the amount of oil used in subsequent batches․ Pay close attention during the popping process and shut off the machine as soon as popping slows significantly․
Prevention: Regularly clean the popping chamber to remove any residual oil or burnt kernel fragments‚ which can contribute to burning․ Monitor the popping process closely and avoid leaving the machine unattended․
Uneven Popping
Issue: Uneven popping‚ where some kernels remain unpopped while others burn‚ often stems from inconsistent heat distribution or insufficient stirring․ This can also occur if the kernels aren’t evenly spread in the popping chamber․
Solution: Ensure the stirring mechanism is functioning correctly․ If manual‚ stir the kernels periodically during the popping cycle․ Verify the kernels are distributed in a single layer․
Prevention: Use the provided measuring cup to ensure accurate kernel quantity․ Avoid overcrowding the popping chamber․ Regularly inspect and clean the stirring arm to maintain optimal performance․

Cleaning and Maintenance
Regular cleaning ensures optimal performance and longevity of your popcorn maker․ Wipe down surfaces after each use and perform deep cleans periodically for best results!
Daily Cleaning Procedure
After each use‚ always unplug your Nostalgia Popcorn Maker and allow it to cool completely before cleaning․ Remove the popping chamber and stirring mechanism․ Wash these components with warm‚ soapy water; avoid abrasive cleaners that could damage the non-stick coating․
Wipe the exterior housing with a damp cloth․ Ensure no water enters the electrical components․ Thoroughly dry all parts before reassembling․ Discard any unpopped kernels․ A quick daily clean prevents buildup and maintains optimal popping performance‚ ensuring fresh‚ delicious popcorn every time․ Remember safety first!
Deep Cleaning Instructions
For a more thorough clean‚ periodically disassemble all removable parts – popping chamber‚ stirring mechanism‚ and measuring cup․ Soak these components in warm‚ soapy water for approximately 15-20 minutes to loosen any stubborn residue․ Use a soft brush to gently scrub away any remaining debris․
Inspect the popping chamber for any burnt-on particles․ The exterior can be cleaned with a damp cloth and mild detergent․ Ensure all parts are completely dry before reassembly․ Deep cleaning‚ performed monthly‚ extends the life of your popcorn maker and maintains hygiene․
Storage Recommendations
To ensure longevity‚ always allow your Nostalgia Popcorn Maker to cool completely before storing․ Clean all removable parts thoroughly and ensure they are completely dry to prevent mold or mildew․ Store the unit in a cool‚ dry place‚ away from direct sunlight and moisture․
Avoid wrapping the power cord tightly around the appliance‚ as this can damage the wiring․ Consider storing the unit in its original packaging for added protection․ Proper storage preserves functionality and keeps your popcorn maker ready for future movie nights!
Advanced Techniques
Elevate your popcorn! Experiment with kernel types‚ create sweet caramel corn‚ or try the classic kettle corn for a truly customized treat․
Using Different Types of Kernels
Beyond standard kernels: While yellow kernels are most common‚ explore options like white hulless‚ red kernels‚ or even mushroom-shaped kernels for unique textures and flavors․
Hulless varieties offer a cleaner eating experience‚ minimizing those pesky hulls․ Red kernels often have a slightly sweeter taste․ Mushroom kernels are ideal for candy coatings‚ as their shape holds toppings exceptionally well․
Important Note: Kernel density varies․ You may need to slightly adjust popping time or oil quantity when using different types․ Always monitor closely during the popping process to prevent burning‚ and refer to kernel-specific instructions if available․
Creating Caramel Corn
Elevate your treat! After popping‚ spread popcorn onto parchment paper․ Prepare a caramel sauce (recipe not included – many online options exist!)․ Drizzle warm caramel evenly over the popcorn‚ gently tossing to coat․
For even coating‚ work in batches․ Return coated popcorn to the popping chamber (turned off and cool!) or a baking sheet․ Bake at a low temperature (around 200°F/93°C) for 30-60 minutes‚ stirring every 10-15 minutes‚ until crisp․
Caution: Caramel is extremely hot! Allow to cool completely before enjoying․ Avoid overcrowding the chamber during caramelization․
Making Kettle Corn
Sweet & Salty Delight! Combine popcorn kernels‚ oil (if required by your model)‚ sugar‚ and a pinch of salt directly in the popping chamber․ A typical ratio is 1/2 cup kernels‚ 1 tbsp oil‚ 1/4 cup sugar‚ and 1/4 tsp salt – adjust to taste․
Start the popping process as usual․ The sugar will melt and caramelize during popping‚ creating the signature kettle corn flavor․ Monitor closely to prevent burning! Stirring isn’t recommended during popping․
Important: Kettle corn can burn easily․ Reduce heat if needed and stay attentive throughout the process for perfect results;
Safety Features Explained
Prioritizing Your Well-being! This popcorn maker includes overheat protection and a cool-touch housing‚ ensuring safe operation and preventing accidental burns during use․
Overheat Protection
Ensuring Safe Operation: Your Nostalgia Popcorn Maker is equipped with a crucial safety feature – overheat protection․ This system automatically shuts off the unit if it reaches an unsafe temperature during operation․
This prevents potential fire hazards and damage to the appliance․ If the unit shuts off unexpectedly‚ immediately unplug it and allow it to cool completely before attempting to restart․
Do not attempt to bypass or disable this safety mechanism․ Regularly inspect the power cord for any signs of damage‚ and never operate the popcorn maker without proper supervision․ This feature is designed to provide peace of mind while enjoying your favorite snack!
Cool-Touch Housing
Safety First: The exterior housing of your Nostalgia Popcorn Maker is designed with a cool-touch feature‚ prioritizing your safety during and immediately after operation․ This means the outer surfaces remain relatively cool to the touch‚ minimizing the risk of accidental burns․
However‚ please note that certain internal components will be hot during use․ Always use caution and avoid touching the popping chamber or stirring mechanism while the unit is powered on or recently used․
The cool-touch housing provides an added layer of protection‚ especially around children‚ but responsible operation and awareness are always essential․
Warranty Information
Peace of Mind: Your Nostalgia Popcorn Maker is covered by a one-year warranty against manufacturing defects from the date of purchase․
Register your product online for efficient support and to ensure warranty coverage!
Registering Your Product
Secure Your Warranty! Registering your Nostalgia Popcorn Maker is quick‚ easy‚ and vital for ensuring seamless warranty service should you ever need it․ Visit our website at [insert website address here – example: www․nostalgiaelectrics․com/registration] and locate the product registration form․
You’ll need your model number (found on the base of the unit) and your purchase date․ Providing this information allows us to efficiently process any potential warranty claims and keep you updated on important product information‚ including new recipes and helpful tips․ Registration confirms your ownership and demonstrates proactive care for your new appliance!
Contacting Customer Support
Need Assistance? Our dedicated customer support team is here to help! For frequently asked questions and troubleshooting tips‚ please visit our website at [insert website address here – example: www․nostalgiaelectrics․com/support]․ If you require further assistance‚ you can reach us via email at [insert email address here – example: support@nostalgiaelectrics․com] or by phone at [insert phone number here – example: 1-800-776-4110]․
Please have your model number and purchase date readily available when contacting us․ We strive to provide prompt and helpful support to ensure your complete satisfaction with your Nostalgia Popcorn Maker․
Frequently Asked Questions (FAQ)
Got Questions? Find answers to common concerns about your Nostalgia Popcorn Maker‚ including kernel types and stirring mechanism importance‚ right here!
Can I use microwave popcorn kernels?
We strongly advise against using pre-packaged microwave popcorn kernels in your Nostalgia Popcorn Maker․ These kernels often contain added oils‚ flavorings‚ and propellants designed for microwave heating‚ which are not suitable for a hot air or traditional popping chamber․
Using these kernels can lead to uneven popping‚ potential damage to the machine‚ and a compromised popcorn quality․ Stick to traditional‚ unflavored popcorn kernels for optimal performance and the best‚ freshest taste․ Your Nostalgia Popcorn Maker is designed to deliver perfect results with standard kernels and your preferred added seasonings!
Is the stirring mechanism essential?
Yes‚ the stirring mechanism is a crucial component of your Nostalgia Popcorn Maker’s design․ It ensures even heat distribution throughout the popping process‚ preventing kernels from burning and promoting consistent popping of nearly every kernel․
Without the stirring action‚ kernels at the bottom of the chamber are likely to scorch while those at the top remain unpopped․ The continuous movement also helps to lift popped kernels away from the heat source‚ contributing to a lighter‚ fluffier final product․ Do not operate the machine without the stirrer!